Shutterbug RSS Feed
New Member
Sooner or later in the evolution of every photographer, a time will come when creating personal style becomes a top priority. After all, we all want our images to be readily recognizable so they grab attention by standing out from the crowd.
Perhaps the best way to facilitate this process is by creating custom presets that reflect your creative vision. It's not only easy to do, but you can make as many presets as you need to accelerate the editing process for the types of images you shoot most. Then you can instantly apply one of these timesaving presets to any image you capture.
You may be wondering why you should undertake this task since your editing software already includes a wide array of built-in presets. Or maybe you'd rather purchase an occasional preset online when something unusual strikes your fancy. Well, there are a few good reasons.
First, the presets built into Photoshop and other image editors are used by everyone else, so they're not really going to imbue your images with a unique look. In fact many of these aren't so great and yield gimmicky results. And why would you spend money purchasing presets from someone else, when it's so easy to create your own?
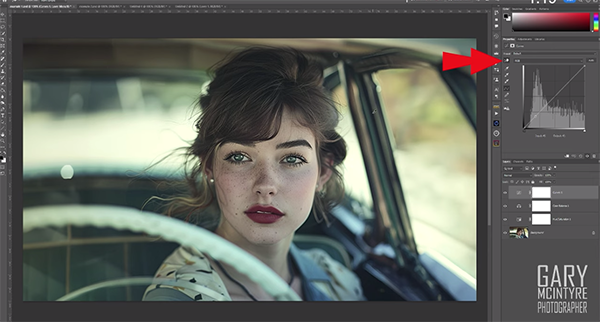
Instructor Gary McIntyre kicks off today's tutorial by saying this: "The new addition to Photoshop for creating your own presets is built upon the Adjustment Layers where you can add as many of these layers as you want. This handy new feature can save a lot of time in your editing if you have a preferred style or want to achieve a certain effect throughout a series of images."
McIntyre's approach to this two-minute episode is quite interesting as he explains how all this works. He pulls up an environmental portrait with the goal of giving the image a vintage look. He does this by modifying Hue/Saturation, Color Balance, and a few other characteristics until he achieves the exact look that he had in mind. And you'll learn how to achieve these simple enhancements.
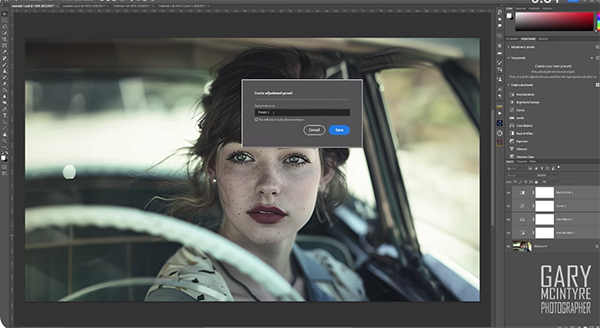
Then when the edit is complete, you'll see how easy it is to create and save a preset of the adjustments he made, so duplicating this particular effect is a simple one-click operation.
We're not suggesting that you simply copy this particular preset (although you certainly can), but rather that you follow McIntyre's instructions to create personal presets of your own that you can use over and over again to reflect the style(s) you like most.
Be sure to visit McIntyre's very popular YouTube channel where you'll find a wide variety of straightforward techniques like this one.
And don't miss the tutorial we posted recently from another image-editing expert who explains why and how you should hide Photoshop's home screen until you really need it. As he says, "In most cases it just gets in the way."
Continue reading...
Perhaps the best way to facilitate this process is by creating custom presets that reflect your creative vision. It's not only easy to do, but you can make as many presets as you need to accelerate the editing process for the types of images you shoot most. Then you can instantly apply one of these timesaving presets to any image you capture.
You may be wondering why you should undertake this task since your editing software already includes a wide array of built-in presets. Or maybe you'd rather purchase an occasional preset online when something unusual strikes your fancy. Well, there are a few good reasons.
First, the presets built into Photoshop and other image editors are used by everyone else, so they're not really going to imbue your images with a unique look. In fact many of these aren't so great and yield gimmicky results. And why would you spend money purchasing presets from someone else, when it's so easy to create your own?
Instructor Gary McIntyre kicks off today's tutorial by saying this: "The new addition to Photoshop for creating your own presets is built upon the Adjustment Layers where you can add as many of these layers as you want. This handy new feature can save a lot of time in your editing if you have a preferred style or want to achieve a certain effect throughout a series of images."
McIntyre's approach to this two-minute episode is quite interesting as he explains how all this works. He pulls up an environmental portrait with the goal of giving the image a vintage look. He does this by modifying Hue/Saturation, Color Balance, and a few other characteristics until he achieves the exact look that he had in mind. And you'll learn how to achieve these simple enhancements.
Then when the edit is complete, you'll see how easy it is to create and save a preset of the adjustments he made, so duplicating this particular effect is a simple one-click operation.
We're not suggesting that you simply copy this particular preset (although you certainly can), but rather that you follow McIntyre's instructions to create personal presets of your own that you can use over and over again to reflect the style(s) you like most.
Be sure to visit McIntyre's very popular YouTube channel where you'll find a wide variety of straightforward techniques like this one.
And don't miss the tutorial we posted recently from another image-editing expert who explains why and how you should hide Photoshop's home screen until you really need it. As he says, "In most cases it just gets in the way."
Continue reading...